Category: K53 Driving Test & Real-Life Practice

  • Driving Licence Eye Test Explained in detail: What to Expect at the DLTC

    Driving Licence Eye Test Explained in detail: What to Expect at the DLTC

    Driving Licence Eye Test explained in detail:
    What to expect at the DLTC

    Before getting a South African driver’s licence, all learner’s must pass the DLTC eye test.

    This vision test uses the forward and backward E chart to check eyesight clarity and safety. This is known as the “Landolt tumbling E style test” which is different to the full letters chart that you see at the optician.

    1: The Test Chart

     • Instead of full letters, you’ll see a block shaped letter “E” in different orientations:
    •  Facing upwards (↑)
    •  Facing downwards (↓)
    •  Facing Left (←)

    •  Facing Right (→)

    Landolt Tumbling E Eye Test Up Down Left Right

    2: The Task

     • You don’t have to name letters.
    • You simply tell the examiner which way the “legs of the E” are pointing.
    • Example: “Up”, “Down”, “Left”, “Right”.
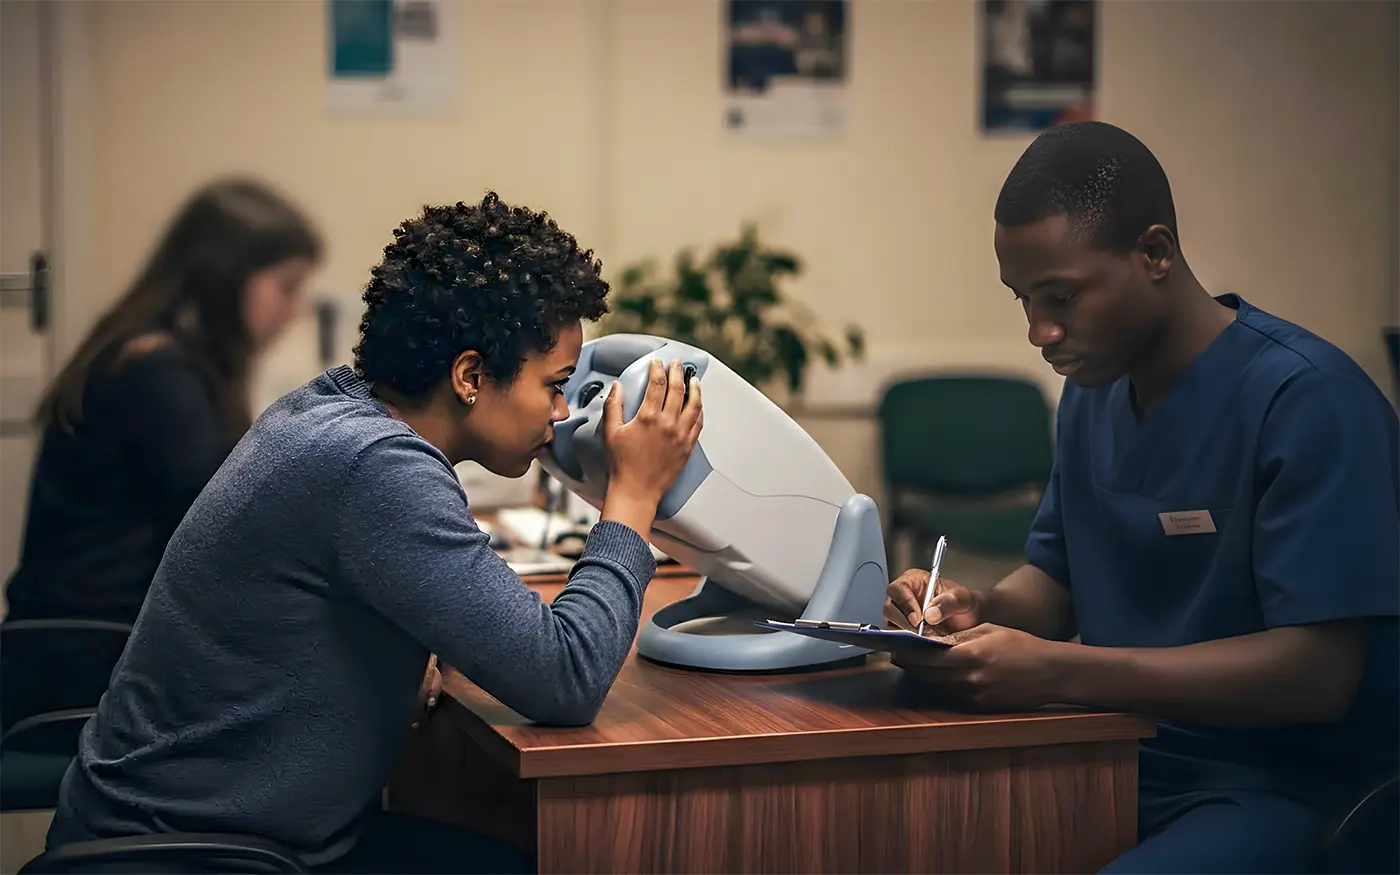
    3: The Procedure

    • You’ll place your chin on a rest or look into a vision screener (a machine at the counter).
    • Each eye is tested separately, then both together.
    • The examiner flips through different lenses/settings to check your vision clarity.

    4: What They’re Checking

    • Visual acuity (sharpness of sight) – can you see the smallest “E” symbols?
    • Peripheral vision – sometimes you’ll be asked to press a button or say when you see a light flicker on the sides.
    • Depth & balance (in some machines) – checks if your eyes work together properly.

    5: Pass Requirement

    You need at least 6/12 vision in one eye, or both eyes together, with or without glasses/contact lenses.
    If you need glasses to pass, it will be marked on your licence as a restriction.

    So, the thing to remember is  the forward and backward “E’s” are part of the eye test, along with “up” and “down” variations.

    Landolt Tumbling E Eye Test Up Down Left Right

    Do I have to take the eye test at the DLTC or can I bring a certificate?

    Yes, absolutely you can bring a certificate, with this condition:
    “The certificate must generally be no older than 3 months (90 days) on the day you apply for your learner’s or driver’s licence”

    Optician Eye Test Certificate

    If it’s older than that, the DLTC will usually require you to redo the eye test on-site.

  • “The Pre-Flight safety check” – The 8 Critical Things Examiners Mark Before You Even Start Driving

    “The Pre-Flight safety check” – The 8 Critical Things Examiners Mark Before You Even Start Driving

    “The Pre-Flight safety check” – The 8 Critical Things Examiners Mark Before You Even Start Driving

    Most people think the K53 test starts when you pull out of the parking space.
    Wrong. Your examiner is already marking you the moment you get in the car. Here are the 8 cockpit checks that can make or break your test before you even touch the accelerator:

    1: The Walk-Around Inspection (Before You Even Get In)

    What the examiner is marking: Did you check around the vehicle for obstacles, other vehicles, or hazards?
    The mistake: Most candidates rush straight to the driver’s door.
    The win: Take 10 seconds to visually scan around the car – examiners love seeing this safety awareness.

    2: Seat Position & Comfort.

    What the examiner is marking: Can you comfortably reach all controls with proper driving posture?
    The mistake: Sitting too close/far from pedals, or adjusting while engine is running
    The win: Adjust seat FIRST – you should have a slight bend in your knee when clutch is fully depressed.

    3: Mirror Adjustments (The Triangle of Vision)

    What the examiner is marking: Can you see properly in all three mirrors without having to lean or stretch?
    The mistake: Only adjusting the rearview mirror, or adjusting mirrors while moving.
    The win: Adjust all three mirrors methodically – rearview first, then left wing mirror, then right wing mirror.

    4: Seatbelt Protocol

    What the examiner is marking: Did you put on your seatbelt before starting the engine AND check that your examiner’s seatbelt is on?
    The mistake: Starting the engine first, or forgetting to check examiner’s seatbelt.
    The win: “Is your seatbelt comfortable?” – asking the examiner shows you care about passenger safety.

    5: Handbrake Check

    What the examiner is marking: Did you confirm the handbrake is properly engaged before starting?
    The mistake: Assuming it’s on, or checking it after starting the engine.
    The win: Physically check the handbrake lever and say “handbrake is on” – examiners want to see you’re methodical.

    6: Gear Position Confirmation

    What the examiner is marking: Is the car in neutral (manual) or park (automatic) before starting?
    The mistake: Not physically checking gear position.
    The win: Touch the gear lever and confirm position – this prevents dangerous rolling when starting.

    7: Dashboard Warning Lights Scan

    What the examiner is marking: Do you notice if any warning lights stay on after starting the engine?
    The mistake: Ignoring the dashboard completely after starting.
    The win: Take 3 seconds to scan the dashboard and mention if you see any warning lights (major bonus points)

    8: Controls Familiarity Test

    What the examiner is marking: Do you know where your indicators, windscreen wipers, lights, and hooter are?
    The mistake: Fumbling for controls during the test
    The win: Quickly test your indicators left and right, locate windscreen wipers, and identify light switches – do this BEFORE you start driving.

    The Secret Examiner Insight:

    Examiners tell us that candidates who nail the cockpit drill score an average of 8-12 points higher on their overall test. Why? Because it shows you’re a systematic, safety-conscious driver from the very beginning.

  • Top 5 Myths About the Practical Driving Test — Busted!

    Top 5 Myths About the Practical Driving Test — Busted!

    Top 5 Myths About the Practical Driving Test — BUSTED!

    Myth 1: “If I stall the car, I will fail instantly.”

    Busted: Stalling once is not an automatic fail — as long as you handle it calmly, restart safely, and don’t roll backwards on a hill. Many learners stall from nerves. Just breathe, recover, and keep going.


    Myth 2: “Examiners always fail people on purpose.”

    Busted: Not true. Examiners follow a strict checklist. They don’t pass or fail you based on feelings — they mark what they see. If you follow the K53 rules correctly, you’ll pass, even if they don’t smile or talk much.


    Myth 3: “If I make one small mistake, I’ve already failed.”

    Busted: The K53 system allows for small errors, like missing one observation or touching a curb — as long as it’s not dangerous. You only fail if you do something unsafe or break a major rule.


    Myth 4: “Only a driving school instructor can teach me properly”

    Busted: While driving schools are helpful, you can learn from a responsible family member or friend — as long as they know the K53 rules and are patient. Many people pass using both: family for practice, and an instructor for final prep.

    Myth 5: “I must use the exact same car I learnt in.”

    Busted: While it’s helpful to use a familiar car, you don’t have to. What matters is knowing how to control the vehicle you’ll use on test day. Practise in the same type (manual or automatic), but you don’t need the exact car.

    BONUS MYTH

    Myth 6: “I’ll never pass because I failed before.”

    Busted: Failing once (or even twice) doesn’t mean you can’t pass. Most learners pass on their second or third try. The key is to learn from your mistakes, practise more, and come back stronger. Every test is a new chance.

    Don’t forget to study our online videos HERE and also on our YOUTUBE channel.
    Practise consistently, stay calm, and trust your training — You’ve got this!

MotusK53 Logo.png

Sign In with Google

[nextend_social_login]

Or

Sign in with Email

Register